Legal Tech: Your Complete Guide to Setting Up Open-Source, Cutting-Edge AI Tools for Your Firm... and they don't require coding.


This guide is not meant to teach you about the technical underpinnings of any of the tools mentioned, it's meant to get you from point A to point B.
Also, note the photos often include steps to follow. While the structure of the guide may jump back and forth between text and pictures, I tried to structure it in a way where you can follow the instructions in a direct line from beginning to end.
Create an "Instance" or "Droplet" with a Virtual Private Server
Sign up for a virtual server provider. I use Digital Ocean and will provide instructions based on that provider. You can use other providers, but it might cause changes to the setup instructions.
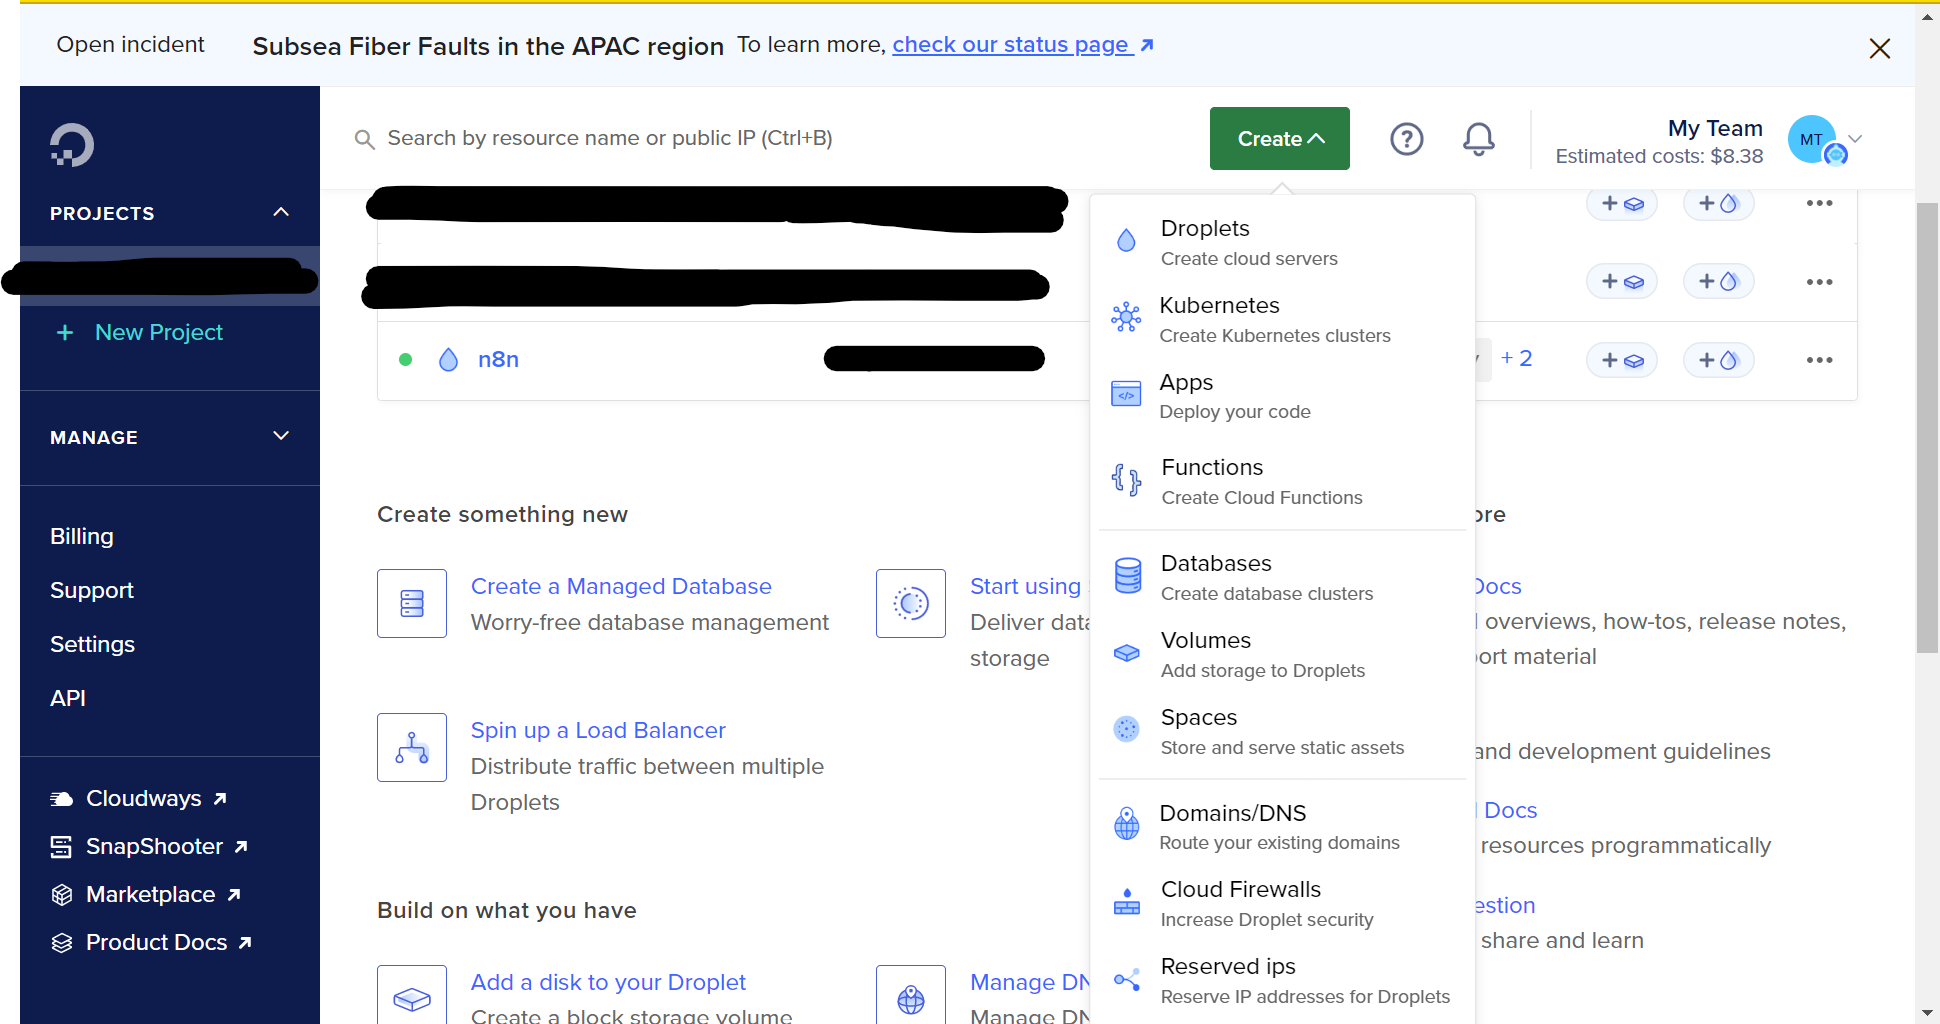
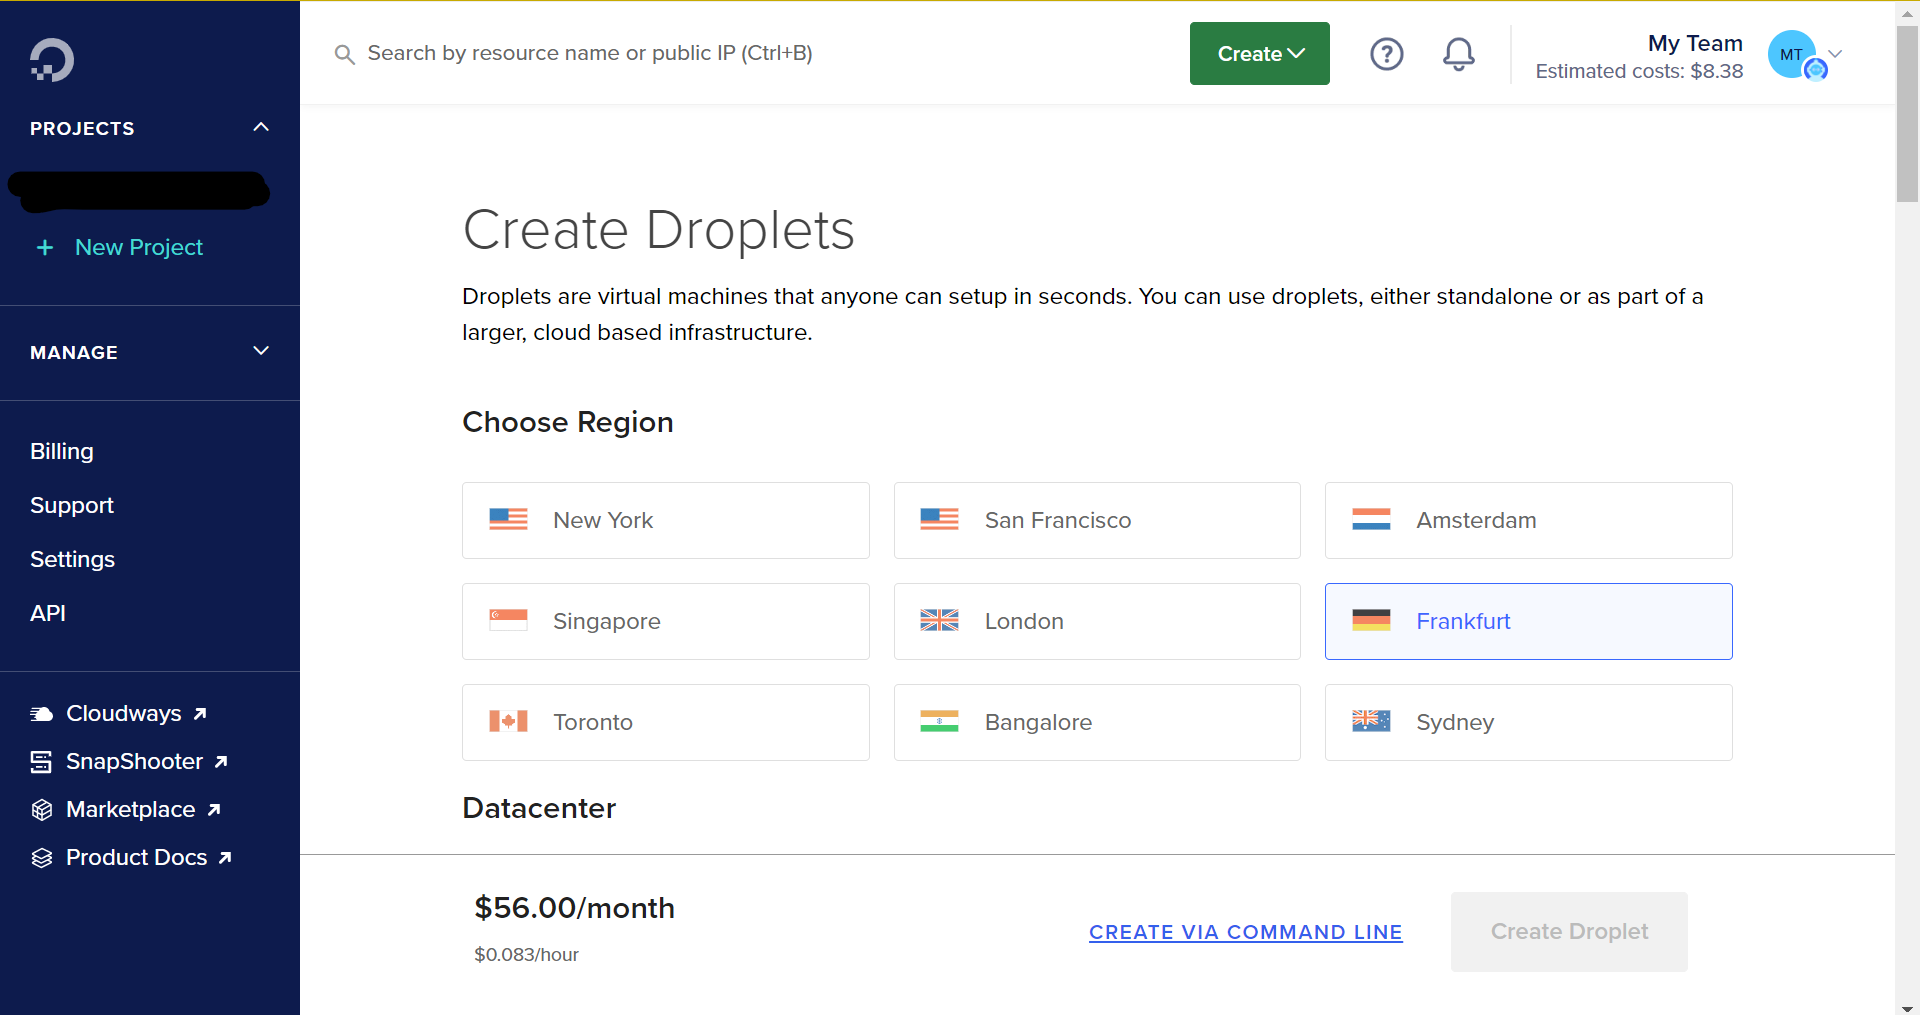
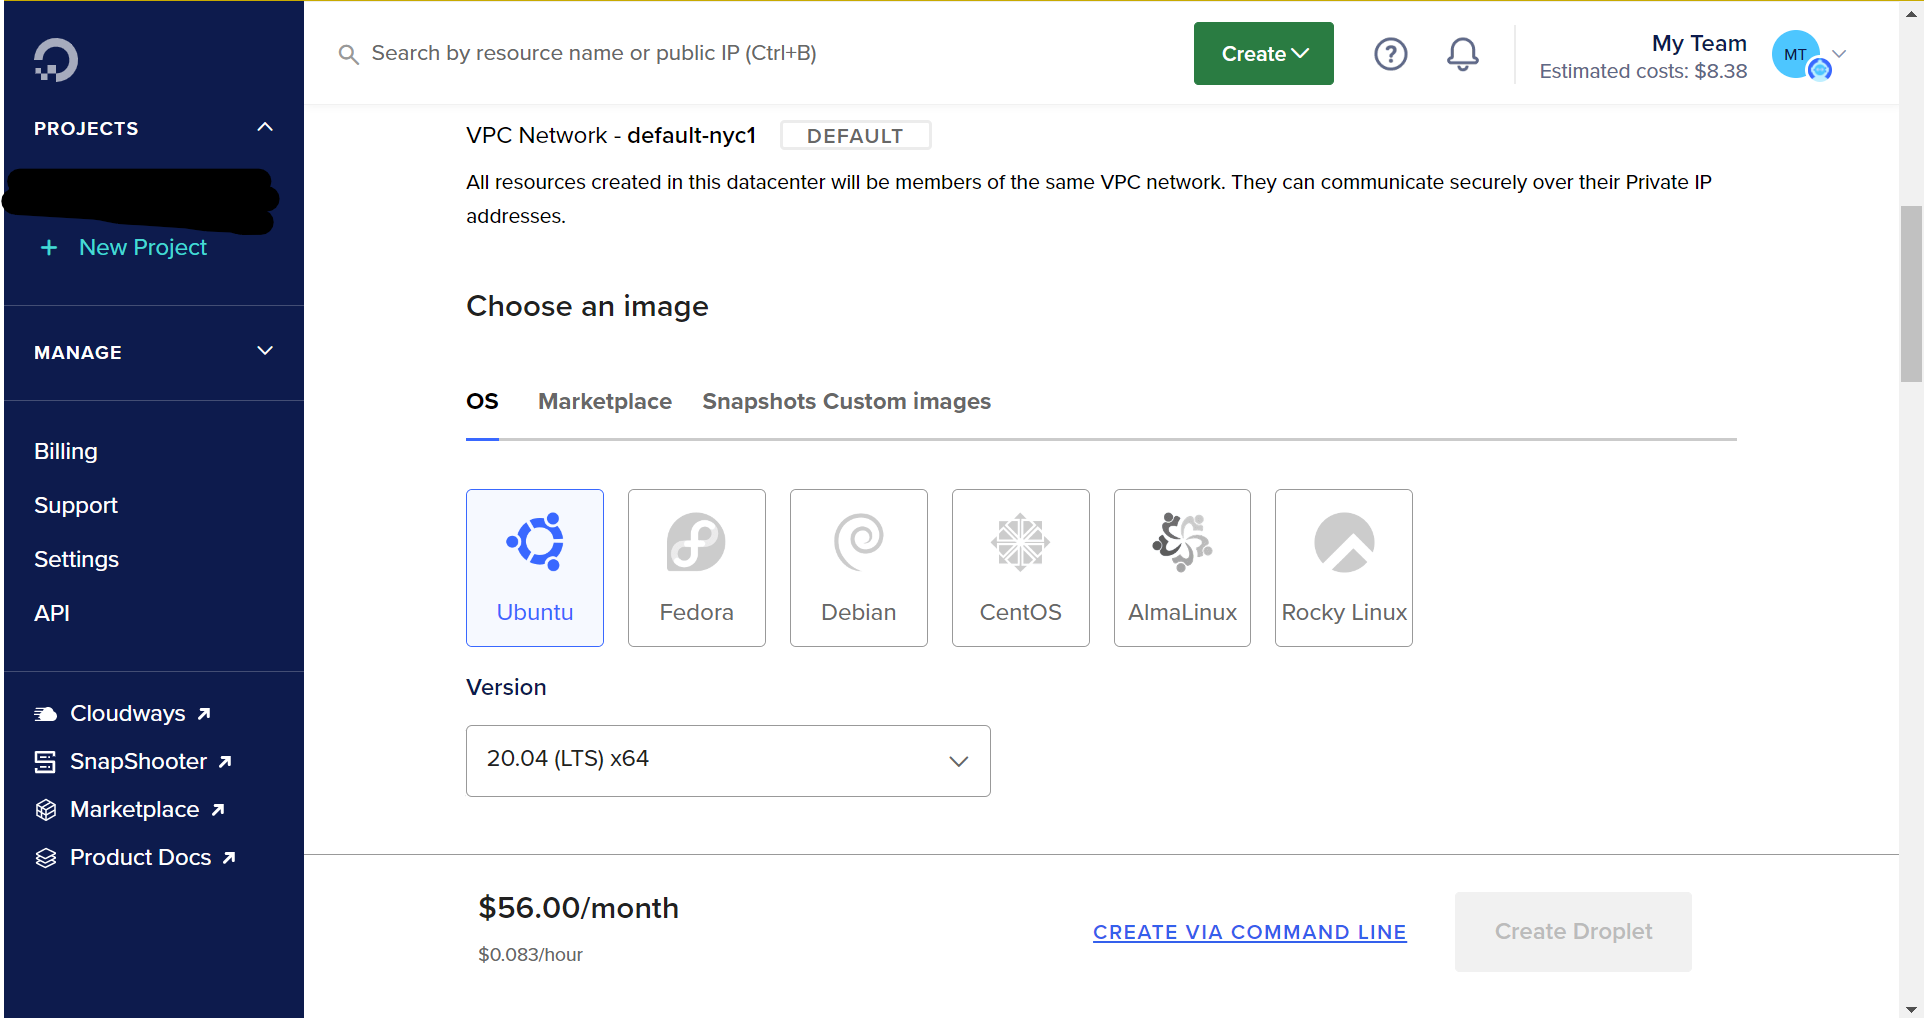
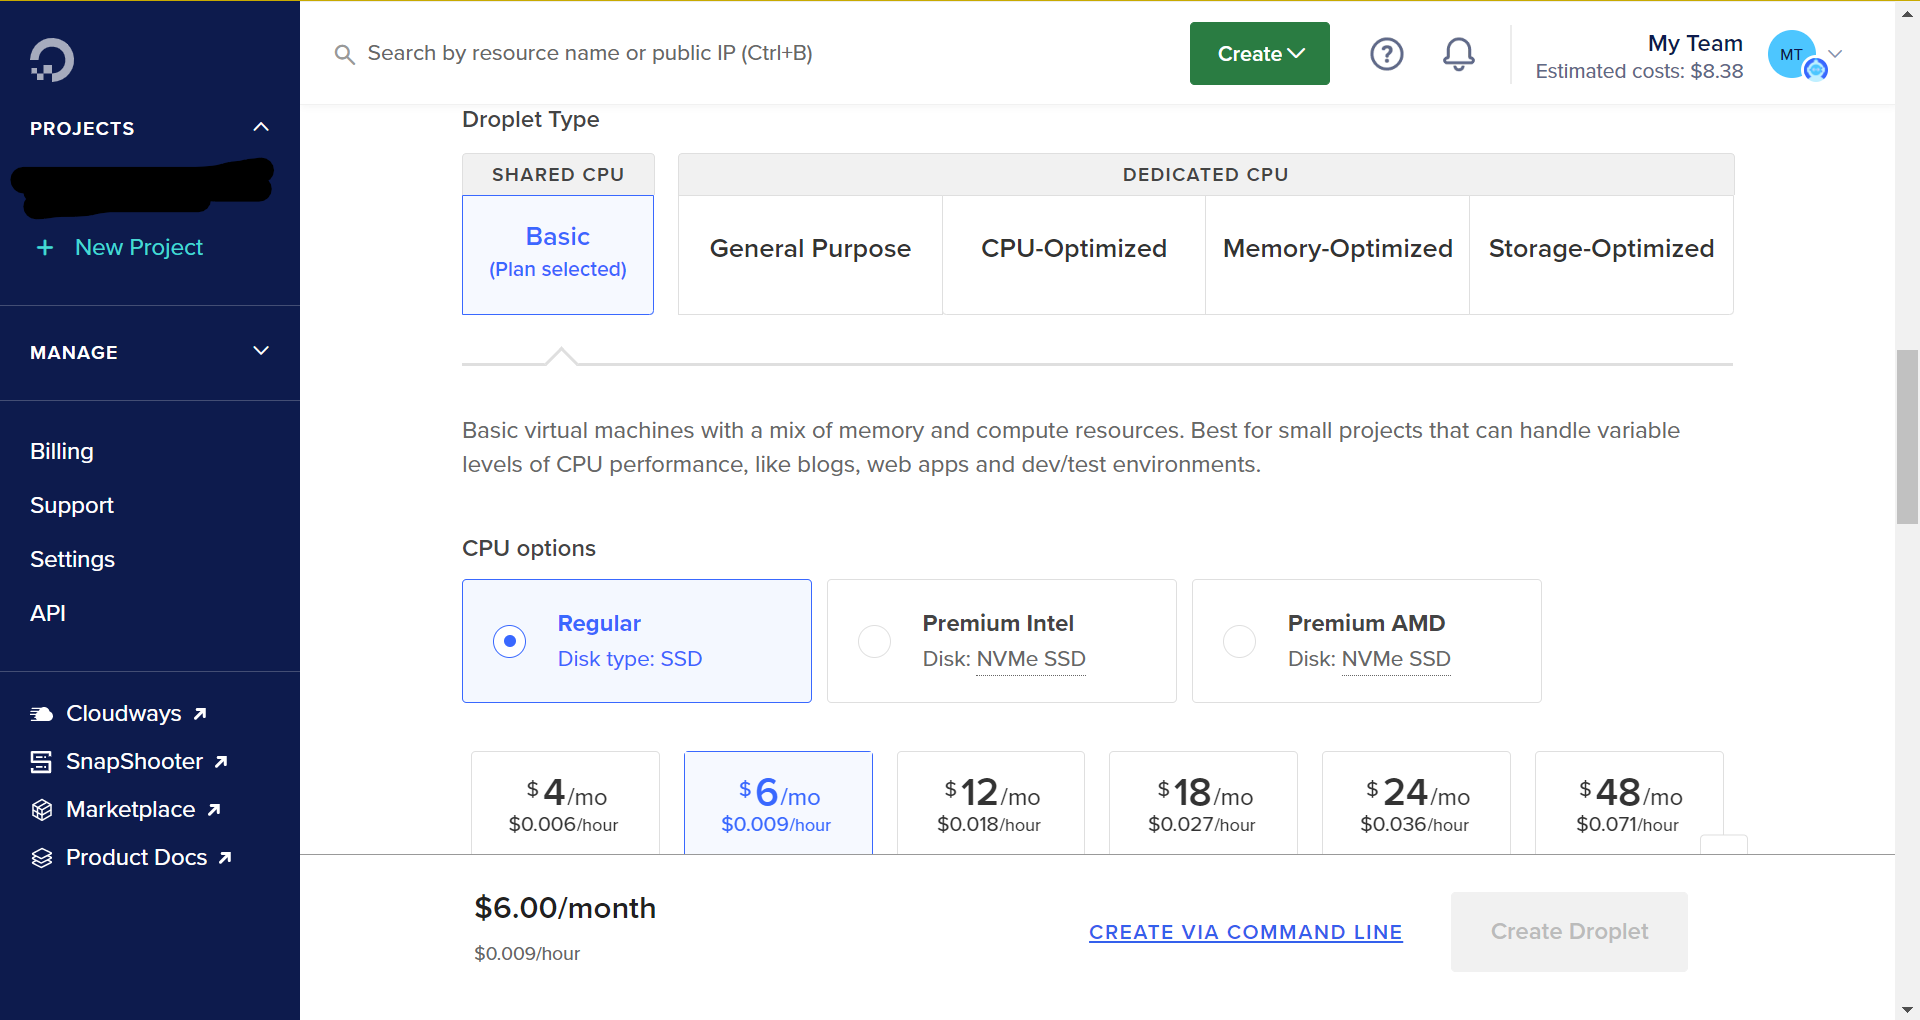
Picking Options for your Droplet
You will need to make some selections about your Droplet, including a location for your server and the specs of your device. I will walk you through a basic installation, but if you are comfortable adjusting, you can opt for different or higher specs.

Open a terminal and run the command below. In Windows, your terminal will be "Windows Powershell," in Mac, the terminal is called "Terminal." Running a command is literally typing in the statement and then pressing enter, so don't be intimidated!
ssh-keygen
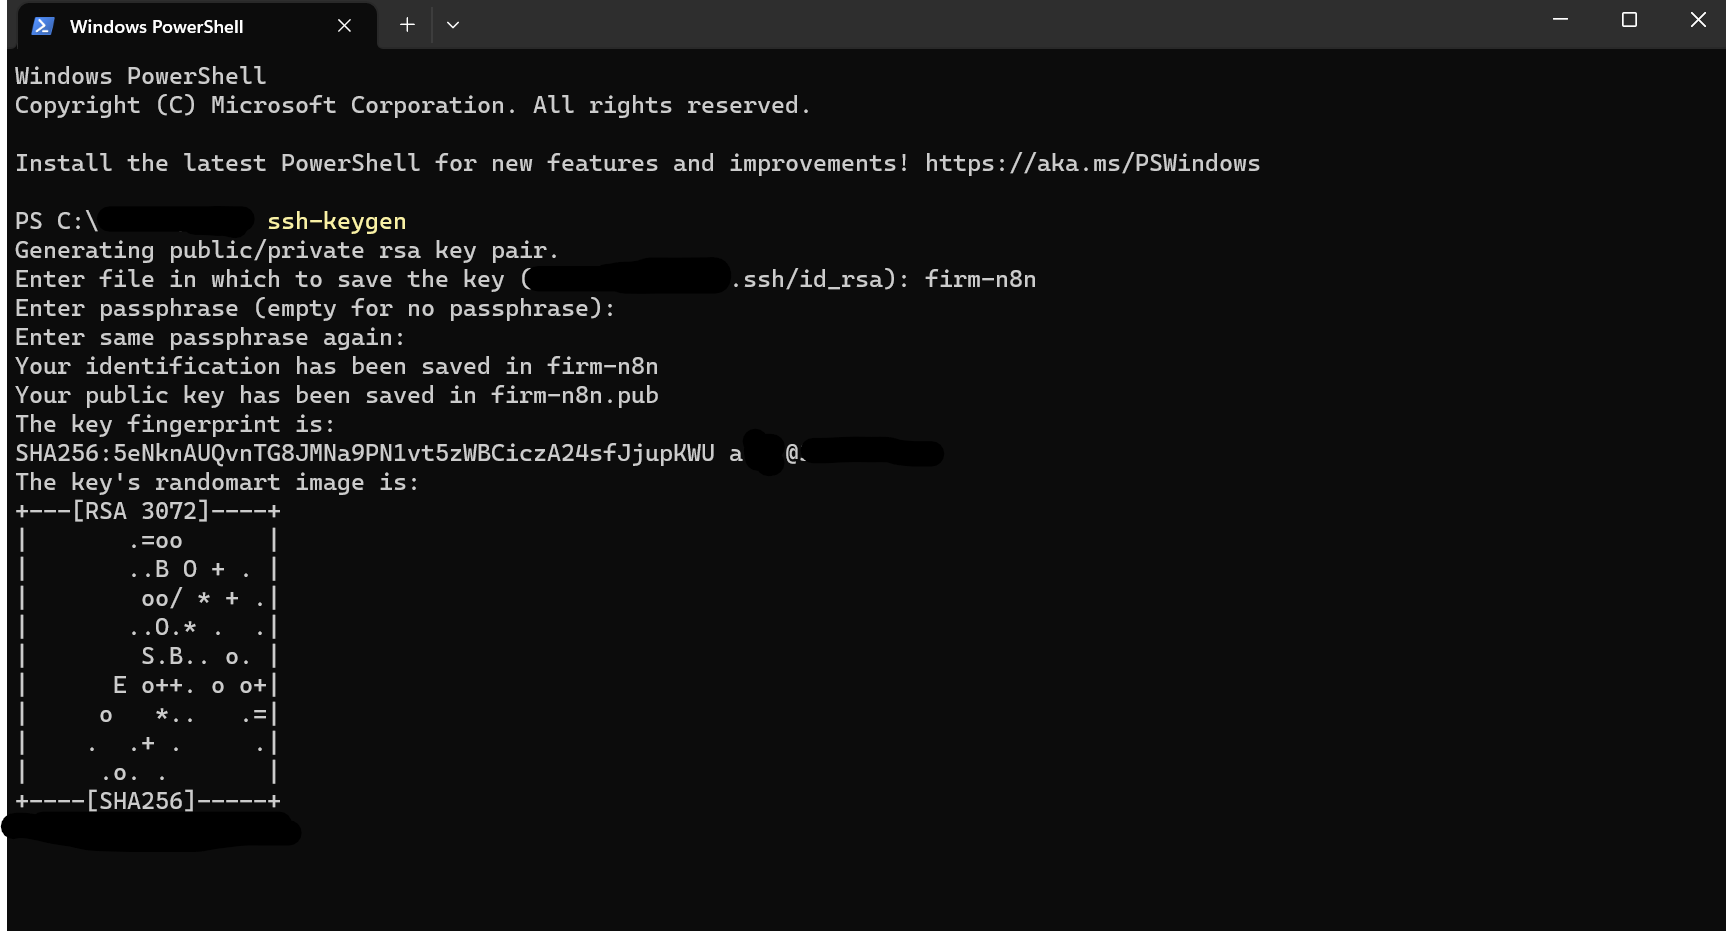
You will be prompted to save and name the key. I selected "firm-flowise," but you can call it whatever you want. When it prompts you for a passphrase, make sure to enter one. Longer and complicated is better, but longer is better than complicated. For example, pick five random dictionary words and string them together with hyphens, then add a number to one of them like this:
"Heroism5-Gala-Mollusk-Childcare-Negative"
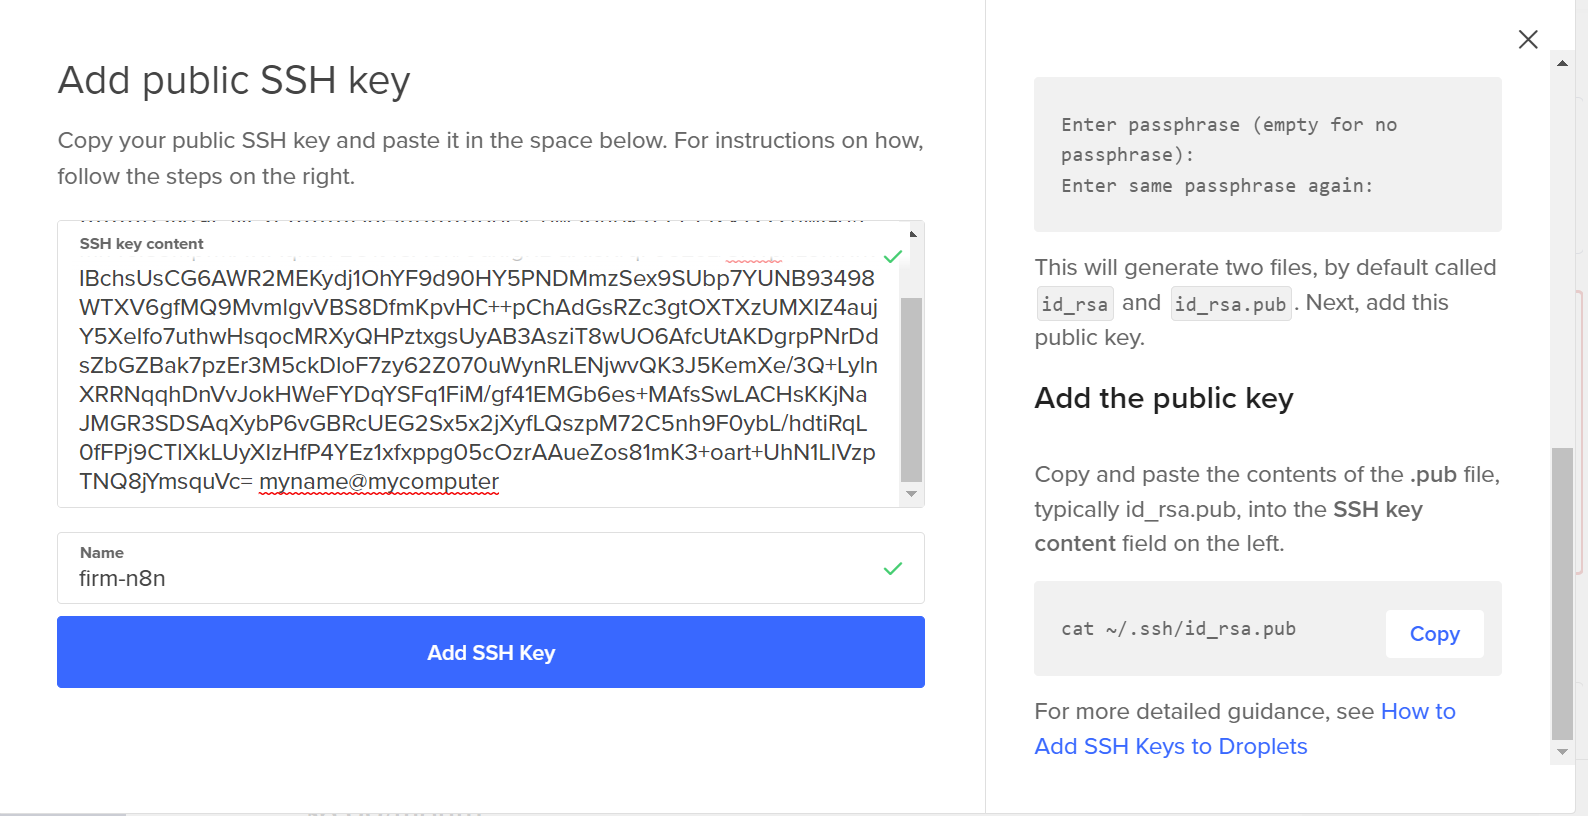
Go to the save file location for the "firm-flowise.pub" file and "Copy the Path." On Windows, you can right-click and select "Copy as Path." On Mac, it's "Copy as Pathname."
Go back to your terminal and enter the following command:
cat PASTE_PATHNAME_HERE
In my case, the command would look like this:
cat "C:\Users\alex\firm-flowise.pub"You'll see a large block of characters that you will need to copy and paste. Here's an example of what the block might look like:
ssh-rsa AAAAB3NzaC1yc2EAAAADAQABAAABgQCbw36hbKzEECQxX127ZuwGq/Imn4eIS3MpTmAWAqkJI7EG1t4SACn/0dxfgRBQXIsKrqF932sL/SHTp/IL3MRrkIBchsUsCG6AWR2MEKydj1OhYF9d90HY5PNDMmzSex9SUbp7YUNB93498WTXV6gfMQ9MvmlgvVBS8DfmKpvHC++pChAdGsRZc3gtOXTXzUMXIZ4aujY5XeIfo7uthwHsqocMRXyQHPztxgsUyAB3AsziT8wUO6AfcUtAKDgrpPNrDdsZbGZBak7pzEr3M5ckDloF7zy62Z070uWynRLENjwvQK3J5KemXe/3Q+LylnXRRNqqhDnVvJokHWeFYDqYSFq1FiM/gf41EMGb6es+MAfsSwLACHsKKjNaJMGR3SDSAqXybP6vGBRcUEG2Sx5x2jXyfLQszpM72C5nh9F0ybL/hdtiRqL0fFPj9CTlXkLUyXIzHfP4YEz1xfxppg05cOzrAAueZos81mK3+oart+UhN1LlVzpTNQ8jYmsquVc= myname@mycomputer
Finally, set the name of your droplet (its Hostname) and click "Create Droplet." Now we wait! It'll take a minute or two for the droplet to be fully deployed.
Installing Flowise on your Droplet
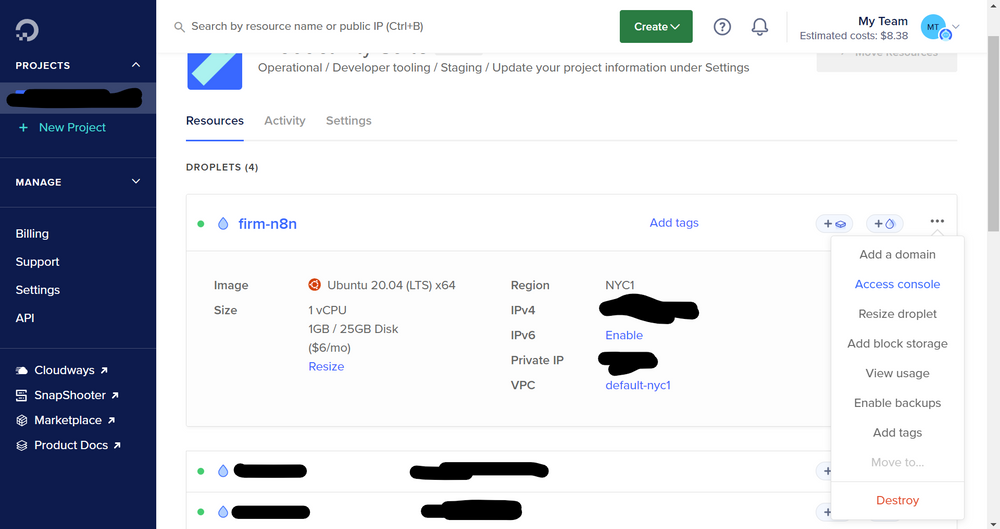
Click on "Launch Droplet Console," and you'll see a terminal open in your browser window.
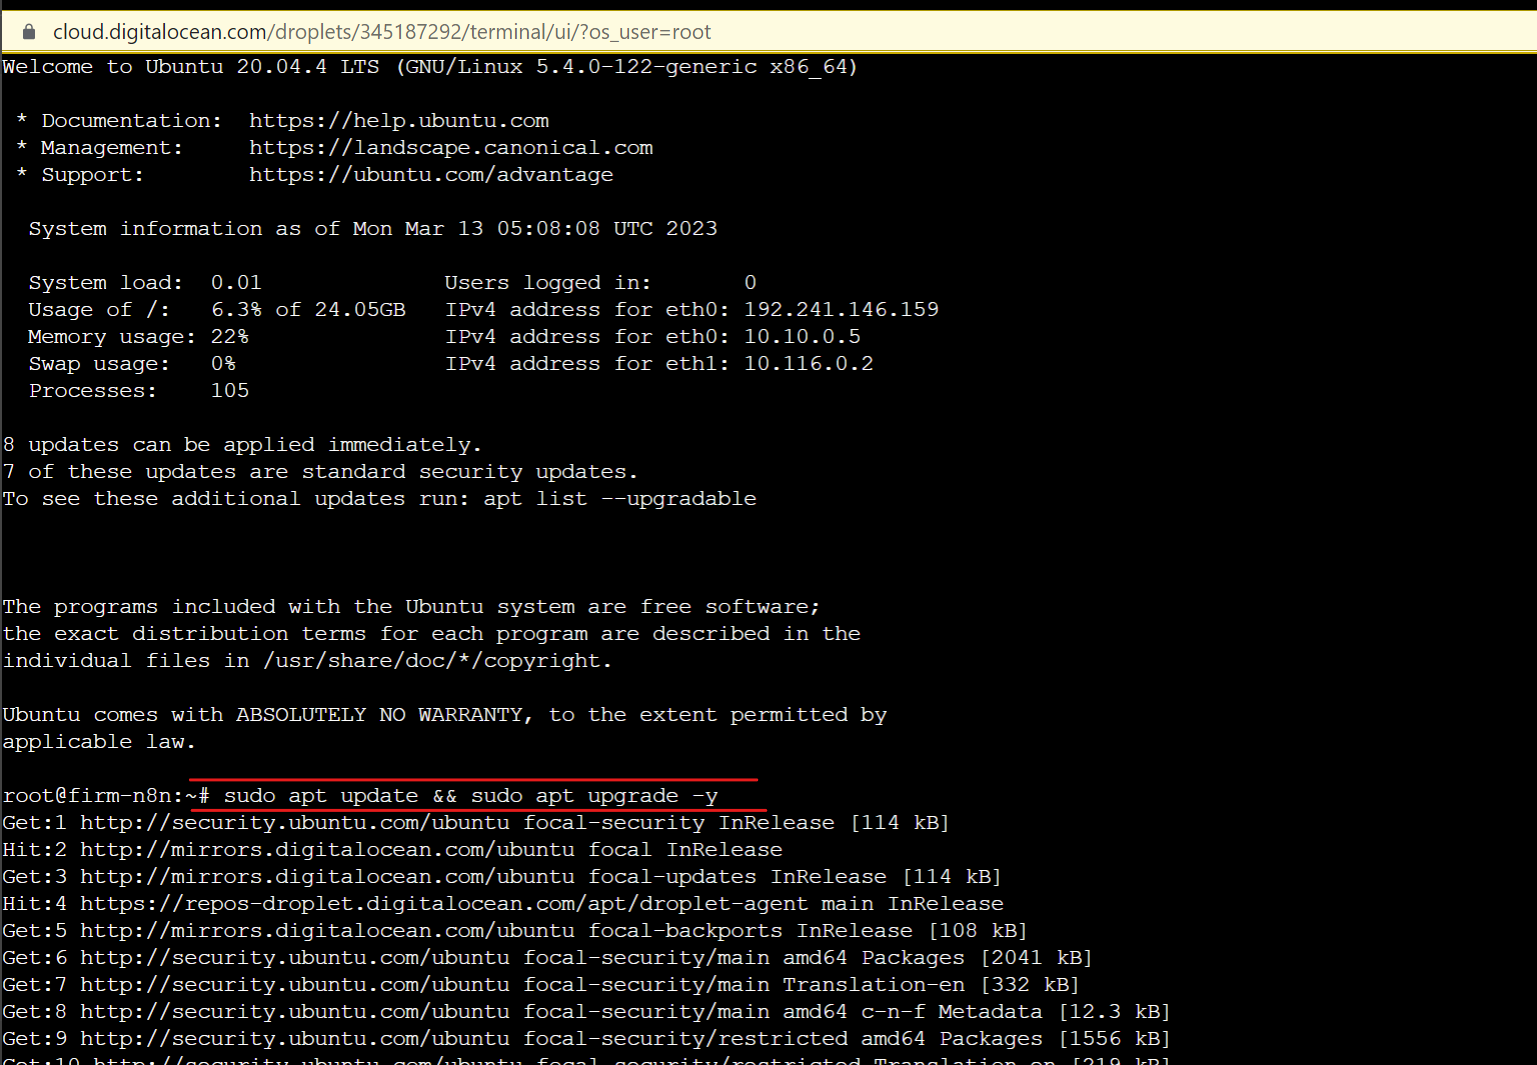
Prepping your Droplet for Setup
The first thing we will do is prepare your droplet to install n8n. The first command you'll enter is the following:
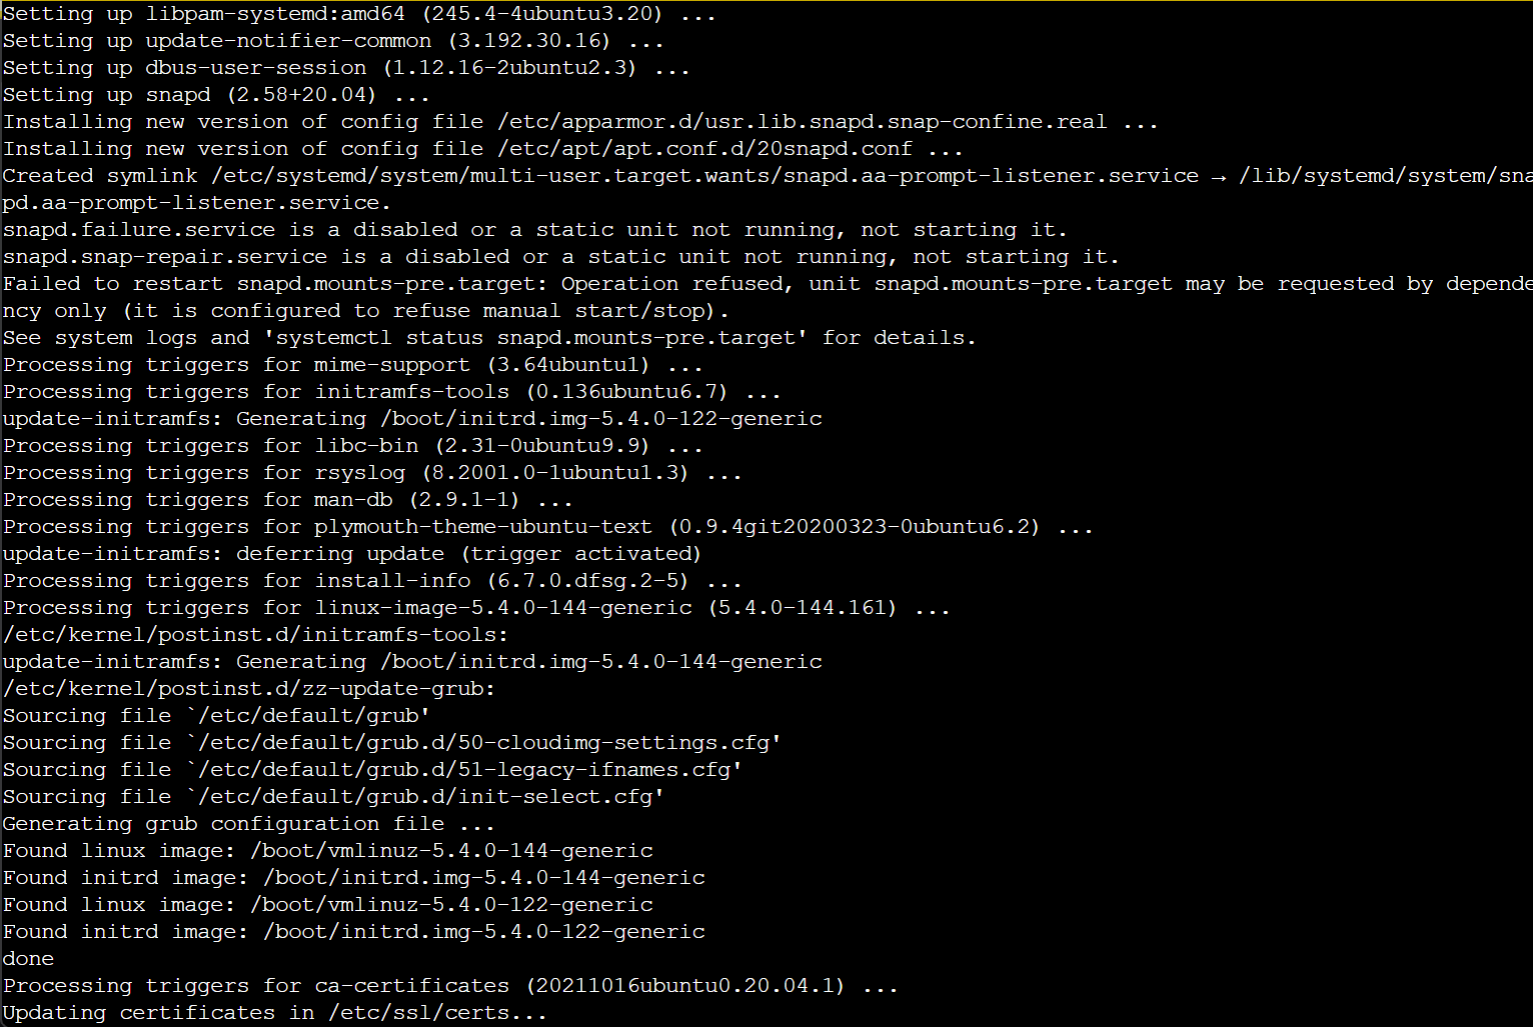
sudo apt update && sudo apt upgrade -y
It'll take another minute or two for the droplet to be ready. In the meantime, you'll see stuff like this:
Getting the Necessary Files to Install Flowise
When the droplet has completed updating, copy and paste the following (yes, the whole thing) into the terminal and execute the command:
curl -fsSL https://get.docker.com -o get-docker.sh
sudo sh get-docker.sh
sudo curl -L "https://github.com/docker/compose/releases/download/1.29.2/docker-compose-$(uname -s)-$(uname -m)" -o /usr/local/bin/docker-compose
sudo chmod +x /usr/local/bin/docker-compose
git clone https://github.com/FlowiseAI/Flowise.git
cd Flowise/docker
Whenever the terminal asks if you want to continue, type in "y" or press enter, as applicable.
Copy and paste the following code into the terminal and execute the command:
nano .envNow, copy and paste the following code into the document, replacing any other content that may be there (make sure to create your own username and password here, and keep it safe):
PORT=3000
DATABASE_PATH=/root/.flowise
APIKEY_PATH=/root/.flowise
SECRETKEY_PATH=/root/.flowise
LOG_PATH=/root/.flowise/logs

FLOWISE_USERNAME=my_username
FLOWISE_PASSWORD=my_password
DEBUG=true
LOG_LEVEL=debug (error | warn | info | verbose | debug)
TOOL_FUNCTION_BUILTIN_DEP=crypto,fs
TOOL_FUNCTION_EXTERNAL_DEP=moment,lodash
Now enter CTRL+X, then hit Y, then Enter.
Next, copy and paste the following code into the terminal and execute the command:
nano docker-compose.ymlNow, copy and paste the following code into the document, replacing any other content that may be there:
version: '3.1'

services:
    flowise:
        image: flowiseai/flowise
        restart: always
        environment:
            - PORT=${PORT}
            - FLOWISE_USERNAME=${FLOWISE_USERNAME}
            - FLOWISE_PASSWORD=${FLOWISE_PASSWORD}
            - DEBUG=${DEBUG}
            - DATABASE_PATH=${DATABASE_PATH}
            - APIKEY_PATH=${APIKEY_PATH}
            - SECRETKEY_PATH=${SECRETKEY_PATH}
            - LOG_LEVEL=${LOG_LEVEL}
            - LOG_PATH=${LOG_PATH}
        ports:
            - '${PORT}:${PORT}'
        volumes:
            - ~/.flowise:/root/.flowise
        command: /bin/sh -c "sleep 3; flowise start"
Now enter CTRL+X, then hit Y, then Enter.
Finally, enter the following commands:
docker compose pull
docker compose down
docker compose up -d
reboot
Bonus Steps
If you want to run your server behind a proxy (a sort of firewall), these steps will help guide you. I'd get a domain name ready before beginning, use this guide if you need instructions on setting up a subdomain and pointing it to a particular web address.
Stay in the terminal window, and enter the following commands:
sudo apt update
sudo apt install nginx
sudo ufw allow 'Nginx HTTP'
Whenever the terminal asks if you want to continue, type in "y" or press enter, as applicable.
Next, enter the following command (make sure to replace "your_domain" with your actual domain, such as flowise.rise.law, or ai.example.com):
sudo nano /etc/nginx/sites-available/your_domainNow, copy and paste the following code into the document, replacing any other content that may be there (again, replace your_domain with your actual domain):
server {
    listen 80;
    listen [::]:80;
    server_name your_domain;
    location / {
        proxy_pass http://localhost:3000;
        proxy_http_version 1.1;
        proxy_set_header Host $host;
        proxy_set_header Upgrade $http_upgrade;
        proxy_set_header Connection 'upgrade';
        proxy_cache_bypass $http_upgrade;
    }
}
Now enter CTRL+X, then hit Y, then Enter.
Enter the following command (replacing "your_domain" with your actual domain):
sudo ln -s /etc/nginx/sites-available/your_domain /etc/nginx/sites-enabled/Finally, enter the command to put your changes into effect:
sudo systemctl restart nginxYou should be good to go! If all is well, when you navigate to your server address you'll see this screen, where you can log in with the credentials you set in "Getting the Necessary Files to Install Flowise."

Now, you have the whole world of advancements in AI at your fingertips, and you don't even need to know how to code!